
introduction
Listen, I know what you are thinking. You usually see me standing over a smoker with a brisket, but every pitmaster needs a secret weapon in the fridge. For me, that secret weapon is a massive batch of Homemade Greek Yogurt.
Believe it or not, this creamy delight is the backbone of the best BBQ marinades and cooling sauces you will ever taste. I remember the first time I ditched the store-bought stuff. I wanted a thicker base for my famous lamb gyro sauce, so I decided to try fermenting my own.
Honestly, the difference blew my mind. Consequently, I never went back to the plastic tubs from the grocery store. This Creamy Greek-style yogurt provides a tang and a velvety texture that you simply cannot buy.
Plus, making Homemade Greek Yogurt feels like a cool science experiment right in your kitchen. You take simple milk and transform it into thick, protein-packed gold. Therefore, if you want to elevate your cooking game, you need to master this recipe.
We are talking about deep, rich flavors that balance out the smoke of a rack of ribs perfectly. Furthermore, your gut will thank you for those live probiotics. Let’s dive into how you can create the ultimate Creamy Greek-style yogurt today.
Why You’ll Love This Homemade Greek Yogurt Recipe
First and foremost, the texture of this Homemade Greek Yogurt is absolutely legendary. You control exactly how thick it gets. If you like it thick enough to stand a spoon in, you can achieve that easily.
Additionally, this Creamy Greek-style yogurt is much more cost-effective than buying premium brands. You can make a massive gallon for the price of a few small individual cups. Moreover, you avoid all those weird thickeners and preservatives found in commercial options.
When you make Homemade Greek Yogurt at home, you use only the purest ingredients. Naturally, this results in a cleaner taste that shines in both sweet and savory dishes. For instance, I love using this Creamy Greek-style yogurt as a healthy substitute for sour cream on my loaded smoked potatoes.
Similarly, it works wonders as a tenderizer for grilled chicken skewers. Because you control the fermentation time, you also control the tanginess. Therefore, you can make it mild for the kids or extra sharp for your spicy Mediterranean recipes. Truly, mastering Creamy Greek-style yogurt gives you total culinary freedom in your backyard kitchen.
Ingredients You’ll Need
To start your journey into Homemade Greek Yogurt, you only need two main items. However, the quality of these ingredients matters immensely. First, grab a gallon of high-quality whole milk.
I prefer local grass-fed milk because it adds a rich, buttery depth to the Creamy Greek-style yogurt. Second, you need a “starter” culture. This is simply a couple of tablespoons of plain yogurt that contains live active cultures.
Once you start making your own, you can just save a bit from your previous batch of Homemade Greek Yogurt to keep the cycle going. Additionally, you will need some filtered water if you choose to use a powdered starter. Some folks like to add a pinch of salt later, but for the base Creamy Greek-style yogurt, keep it simple.
Moreover, ensure your equipment is spotless to keep the good bacteria happy.

| Ingredient | Amount | Purpose |
|---|---|---|
| Whole Milk | 1 Gallon | The base for the yogurt |
| Plain Yogurt (with live cultures) | 3 Tablespoons | The starter culture |
| Vanilla Extract (Optional) | 1 Teaspoon | For a sweet version |
| Honey (Optional) | To taste | Natural sweetener |
To start your journey into Homemade Greek Yogurt, you only need two main items. However, if you’re looking for a sweet treat to enjoy while the yogurt is setting, consider trying out these air fryer donuts from scratch.
Substitutions & Variations
While I swear by whole milk for the creamiest Creamy Greek-style yogurt, you can certainly make adjustments. For example, you can use 2% milk if you want a lower-fat version. However, keep in mind that the resulting Homemade Greek Yogurt will be slightly less decadent.
If you are dairy-free, you can attempt this with full-fat coconut milk. Consequently, you will need a specific vegan starter culture to make it work. Furthermore, you can vary the flavor profiles once the Creamy Greek-style yogurt is finished.
I often stir in smoked honey to give it a BBQ-friendly twist. Alternatively, add fresh herbs like dill and mint to transform your Homemade Greek Yogurt into a world-class kebab sauce. Some people even like to whisk in protein powder for an extra muscle-building boost.
No matter what you choose, the core process of making Creamy Greek-style yogurt remains the same. Just remember that the higher the fat content in your milk, the smoother your Homemade Greek Yogurt will feel on the tongue.
Step-by-Step Instructions
First, pour your milk into a large heavy-bottomed pot or a multi-cooker. Heat the milk slowly until it reaches 180°F (82°C). This step is crucial because it denatures the proteins, which ensures your Homemade Greek Yogurt sets properly.
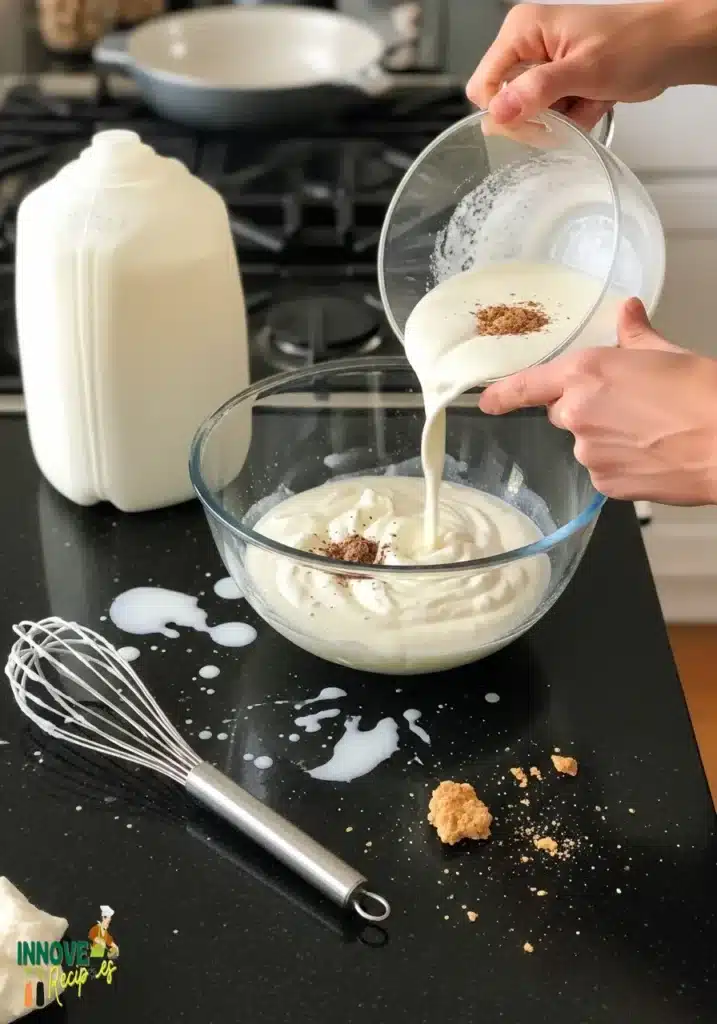
Next, remove the pot from the heat and let it cool down to about 110°F (43°C). Do not rush this part, as too much heat will kill your starter cultures. Once the milk reaches the target temperature, whisk in your yogurt starter gently.
Note: This video is for demonstration purposes and may use a slightly different method.
Consequently, the longer it sits, the tangier it becomes. After the incubation period, you will have regular yogurt. To turn it into Creamy Greek-style yogurt, you must strain it.
Line a colander with cheesecloth or a clean tea towel and pour the yogurt in. Let the whey drain out for 2 to 4 hours in the fridge. Finally, scrape your thick, beautiful Creamy Greek-style yogurt into a bowl and whisk it for a silky finish.
First, pour your milk into a large heavy-bottomed pot or a multi-cooker. As you experiment with different recipes, you might also want to check out this delicious air fryer gluten free chicken tenders for a perfect pairing.
Pro Tips for Success
To ensure your Homemade Greek Yogurt turns out perfect every single time, follow these veteran tips. First, always use a digital thermometer. Guesswork is the enemy of consistent Creamy Greek-style yogurt.
Second, do not stir the milk while it is incubating. Let the bacteria do their work in peace. Additionally, if you want “Ultra-Greek” thickness, strain the yogurt overnight.
The resulting Creamy Greek-style yogurt will be almost like cream cheese! Moreover, save the liquid whey that drains out. You can use it in smoothies or as a liquid for baking bread.
It is full of nutrients and shouldn’t go to waste. Furthermore, if your Homemade Greek Yogurt is too tart, shorten the incubation time next time. On the other hand, if it is too mild, let it sit longer.
Lastly, always start with the freshest milk possible for the cleanest flavor.
Storage & Reheating Tips
Proper storage keeps your Homemade Greek Yogurt fresh and tasty for all your BBQ sides. Store the Homemade Greek Yogurt in an airtight glass container in the back of the refrigerator. Generally, it will stay fresh for up to two weeks.
However, always check for any off-smells before consuming. If you notice liquid forming on top, do not worry. That is just a bit more whey separating; simply stir it back into your Homemade Greek Yogurt.
Regarding reheating, you should generally avoid it. High heat can cause Homemade Greek Yogurt to curdle and lose its probiotic benefits. If you are using it in a warm sauce, whisk it in at the very end of the cooking process over low heat.
This technique preserves the creamy texture of the Homemade Greek Yogurt without breaking the emulsion. Therefore, treat it as a finishing touch rather than a primary cooking liquid.
Proper storage keeps your Homemade Greek Yogurt fresh and tasty for all your BBQ sides. To complement your yogurt, you can whip up some Old Fashioned Salmon Patties Recipe with Flour that will go wonderfully alongside it.
What to Serve With This Homemade Greek Yogurt
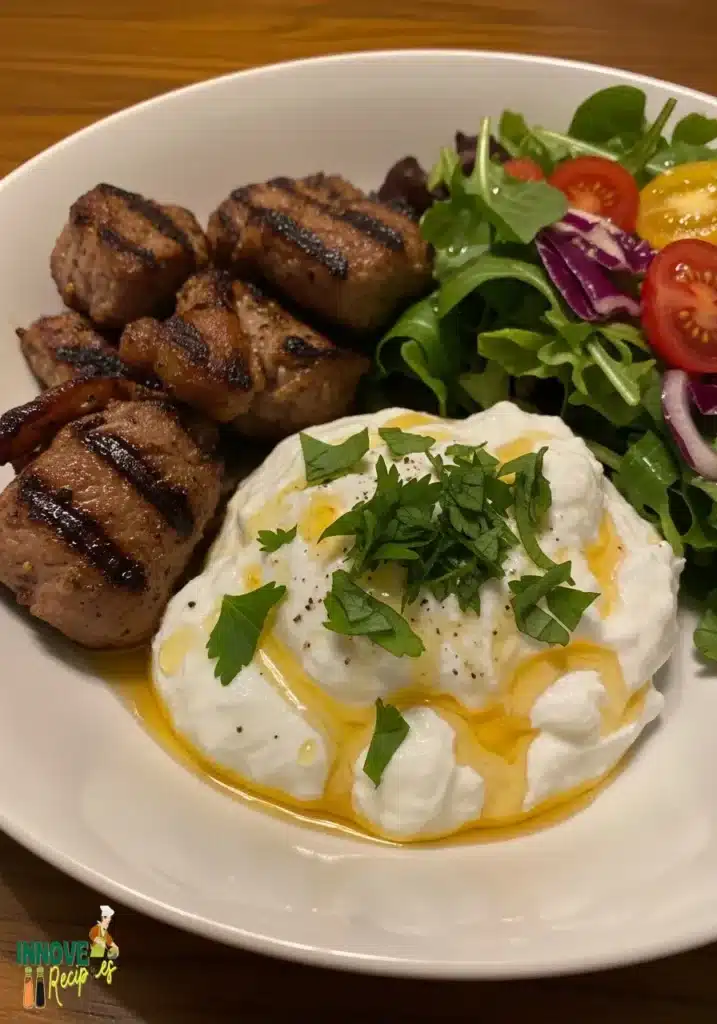
This is where the fun starts for a BBQ lover like me. Homemade Greek Yogurt is the perfect partner for charred meats. For example, I love serving a dollop of Homemade Greek Yogurt alongside spicy grilled harissa chicken.
The coolness of the yogurt cuts through the heat perfectly. Additionally, you can mix Homemade Greek Yogurt with garlic, lemon, and cucumber to make a killer Tzatziki. This sauce belongs on every pulled pork wrap or brisket taco.
Moreover, you can use Homemade Greek Yogurt as a base for a healthy slaw dressing. Instead of heavy mayo, use Homemade Greek Yogurt for a tangy, refreshing crunch. If you are hosting a morning tailgate, serve it with granola and grilled peaches.
The smoke from the peaches pairs beautifully with the tart Homemade Greek Yogurt.
Truly, the possibilities are endless when you have a jar of this stuff ready to go.
FAQs
Can I make Homemade Greek Yogurt without a thermometer?
Technically, you can use the “finger test,” but I do not recommend it. For the most consistent Homemade Greek Yogurt, a digital thermometer ensures you do not kill the cultures or fail to denature the proteins. Precision leads to perfection.
Why is my Homemade Greek Yogurt runny?
Several factors can cause runny Homemade Greek Yogurt. Perhaps the milk did not reach 180°F, or maybe the incubation temperature was too low. Additionally, ensure your starter culture is fresh and contains live active bacteria. Finally, make sure you strain it long enough to reach your desired thickness.
Is Homemade Greek Yogurt healthier than store-bought?
Absolutely! Your Homemade Greek Yogurt contains no added sugars, artificial thickeners, or gums. Furthermore, it often has a higher count of live probiotics because it hasn’t been sitting on a store shelf for weeks. It is the gold standard for healthy eating.
What can I do with the leftover whey from Homemade Greek Yogurt?
Do not throw it away! You can use the whey from your Homemade Greek Yogurt in place of water in bread recipes or as a probiotic boost in smoothies. Some folks even use it to soak grains or as a starter for fermented vegetables. It is a versatile byproduct.
Homemade Greek yogurt is a versatile and creamy staple that can be used in various dishes, from marinades to desserts. This easy-to-make yogurt is not only rich in probiotics but also allows you to control the flavor and texture to your liking, making it an indispensable addition to your kitchen yogurt.
Nutrition Information (per serving)
This nutrition profile is based on a 1-cup serving of Homemade Greek Yogurt made with whole milk.
| Nutrient | Amount |
|---|---|
| Calories | 150 kcal |
| Protein | 20g |
| Total Fat | 8g |
| Carbohydrates | 7g |
| Calcium | 20% DV |
Conclusion
In conclusion, making Homemade Greek Yogurt is a game-changer for any home cook or backyard pitmaster. It is simple, affordable, and incredibly rewarding. Once you taste the rich, tangy goodness of your own Homemade Greek Yogurt, those store-bought tubs will never satisfy you again.
Whether you use it to cool down a spicy plate of wings or as a protein-rich breakfast, this recipe is a winner. So, what are you waiting for? Grab a gallon of milk and start your first batch of Homemade Greek Yogurt tonight!
Your taste buds and your guests will thank you at the next big cookout. Don’t forget to share your results with me. I want to see those thick, creamy bowls of Homemade Greek Yogurt you’ve created! Now, get in the kitchen and make some magic happen!
Print
Homemade Greek Yogurt
- Total Time: 8 to 12 hours 20 mins
- Yield: 1 gallon 1x
- Diet: Gluten Free
Description
Master the art of thick, creamy Homemade Greek Yogurt with Ethan’s foolproof guide. Perfect for BBQ marinades, healthy snacks, and cooling down spicy wings!
Ingredients
1 gallon Whole Milk
3 tablespoons Plain Yogurt (with live cultures)
1 teaspoon Vanilla Extract (Optional)
Honey to taste (Optional)
Instructions
- Pour the whole milk into a large heavy-bottomed pot or multi-cooker
- Heat the milk slowly until it reaches 180°F (82°C), then remove from heat and cool to 110°F (43°C)
- Whisk in your yogurt starter gently and keep the mixture warm for 8 to 12 hours
- After incubation, line a colander with cheesecloth and pour the yogurt in to strain for 2 to 4 hours in the fridge
- Scrape the thick yogurt into a bowl and whisk for a silky finish
Notes
Use a digital thermometer for accuracy.
Do not stir the milk while incubating.
Strain overnight for 'Ultra-Greek' thickness.
- Prep Time: 20 mins
- Cook Time: 8 to 12 hours
- Category: Dairy
- Method: Fermenting
- Cuisine: Greek
Nutrition
- Serving Size: 1 cup
- Calories: 150 kcal
- Sugar: 7 g
- Sodium: 50 mg
- Fat: 8 g
- Saturated Fat: 5 g
- Unsaturated Fat: 3 g
- Trans Fat: 0 g
- Carbohydrates: 7 g
- Fiber: 0 g
- Protein: 20 g
- Cholesterol: 30 mg
Keywords: DIY Greek yogurt, Thick strained yogurt, Probiotic-rich yogurt at home, Creamy Greek-style yogurt